Passa al contenuto
  • +49 40 3680 74990
Igloo
  • 0
  • Accedi
  • AR CS NL EN FI FR DE HI IT PL PT ES SV UK
  • Contattaci
  • Home
  • Negozio
  • Supporto

    Per utente


    Richiesta di supportoSondaggio clientiElenco di tutte le istruzioni per i test Procedura QCValutazione dei risultatiGuida Igloo Reader Pro

    Per produttore di test


    Adattamento del testPasso 1 | Ottieni il tuo Igloo Passo 2 | Calibrazione del test Passo 3 | Posiziona il codice a barre sulla cartuccia

    Per farmacista


    Aggiungi alla mappa della salute Igloo Richiesta di rapporto personalizzato
  • Download
  • Documenti
  • Per aziende


     Per Aziende


    Aziende point-of-care Farmacie Cliniche dentali

    In arrivo*


    Palestra e centri fitness Telemedicina Cosmetologia e saloni di bellezza Assistenza ostetrica
  • Hub scientifico


    Biomarcatori


    Vitamina D FerritinaHbA1c Pannello lipidico e glucosio nel sangueApolipoproteina BLipoproteina APannello epatico (ALT, AST, albumina)Pannello renale (urea, creatinina, acido urico)TestosteroneTSHhs-CRP

    Tecnologia


    Igloo Reader ProDx StudioDx Care

    Azienda


    Informazioni su Dx 365
  • Notizie
  • Contattaci
Igloo
  • 0
    • Home
    • Negozio
    • Supporto
    • Download
    • Documenti
    • Per aziende
    • Hub scientifico
    • Notizie
    • Contattaci
  • +49 40 3680 74990
  • AR CS NL EN FI FR DE HI IT PL PT ES SV UK
  • Accedi
  • Contattaci

QC Procedure 

Using Igloo Reader Pro with QC Calibration Test

Step 1: 
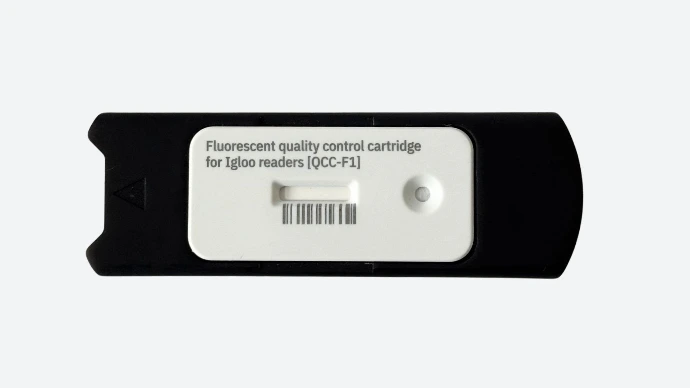

Prepare the QC Cartridge

  • Make sure you have an official QC calibration cassette 
  • Insert the cassette into the designated QC adapter
  • Ensure the cassette is undamaged and not expired

Step 2: 
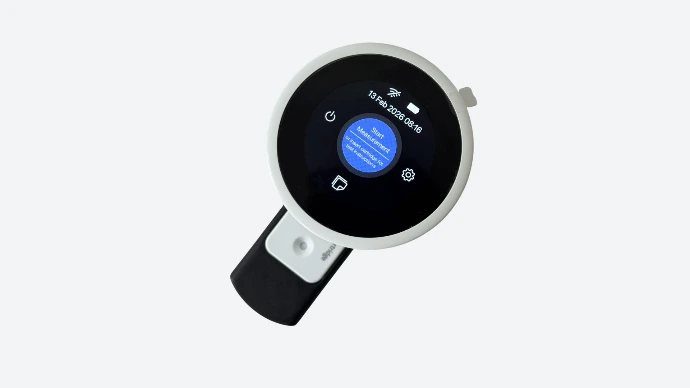

Power on the Reader

  • Press and hold the round power button located on the bottom side of the Igloo Reader Pro
  • Wait for the screen to fully load to the main menu

Step 3: 
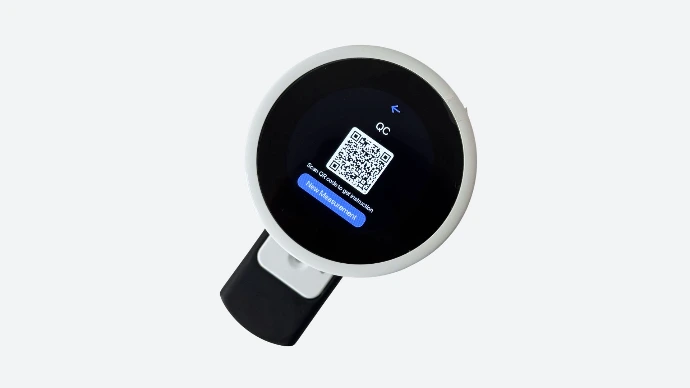

Insert the Adapter into the Reader

Insert the adapter into the reader (the arrow shows which side the adapter should face) and wait until the QR code appears on the screen and the Start measurement button becomes available.

Step 4: 


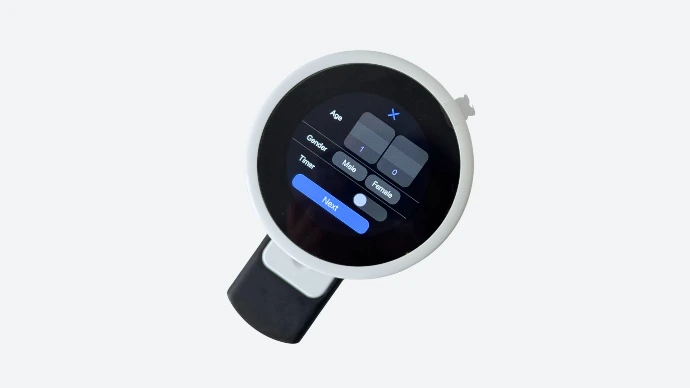
Data can be left blank

You can skip the timer and leave the fields empty when performing the QC test

Step 5: 


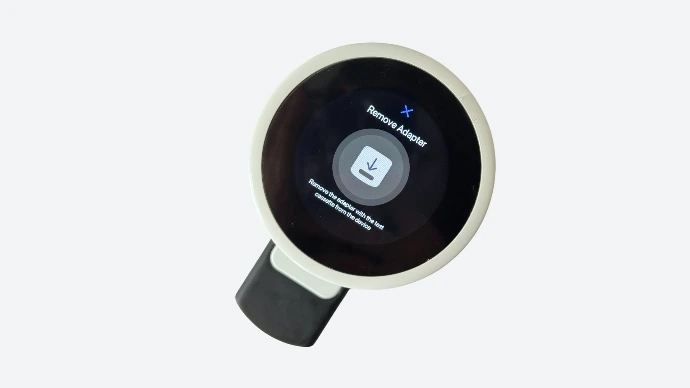
Follow the on-screen instructions

Remove the QC test and insert it again

Step 6: 


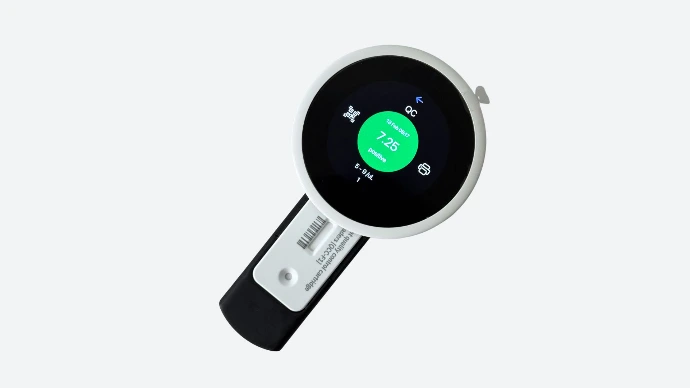
The reader calibration using the QC test has been successfully completed


Step 7: 
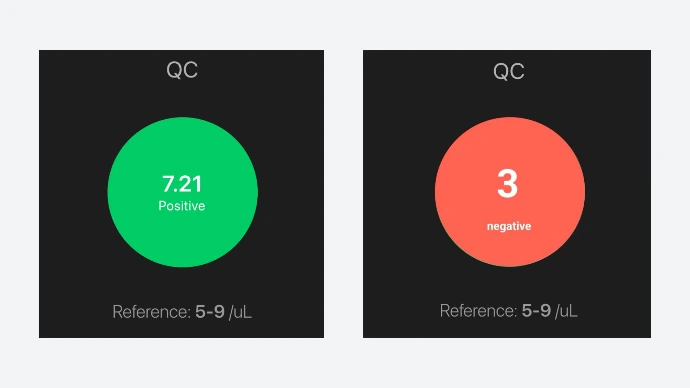

Reference value check

In normal conditions, the reference value should be between 5 and 9, any other value is incorrect and outside the normal range.

  • ✅ QC successful — validity extended for 12 months
  • ❌ QC failed — repeat test or contact technical support

Step 8: 
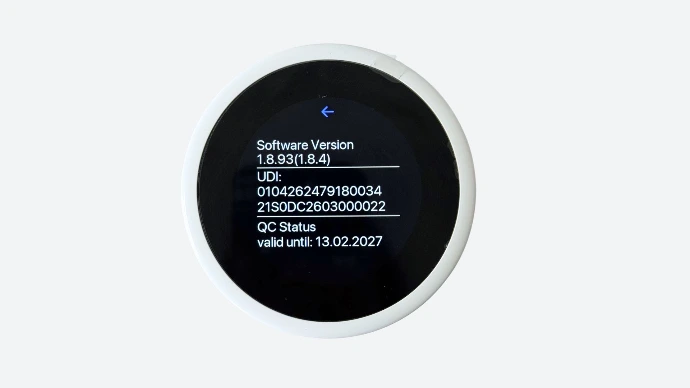

Confirm QC Status

To verify the QC expiration:
    • Go to Settings → About
    • Check the field: QC valid until [date]
Legale

  • Impronta
  • Informazioni legali
  • Informativa sulla privacy
  • Informativa sui cookie
  • Termini e condizioni di vendita


Assistenza clienti

  • Centro richieste di supporto
  • Contattaci
  • Download
  • Documenti
  • Istruzioni per il test
  • Istruzioni del produttore del test
Supporto telefonico

  • +49 40 3680 74990
Reti sociali

Social Media

© Dx365 GmbH - Termini e condizioni - Informativa sulla privacy
الْعَرَبيّة | Čeština | Nederlands | English (US) | Suomi | Français | Deutsch | हिंदी | Italiano | Język polski | Português | Español | Svenska | українська
Fornito da Odoo - Il n° 1 tra gli e-commerce open source

Rispetto della tua privacy è la nostra priorità.

Consentire l'uso dei cookie da questo sito web su questo browser?

Utilizziamo i cookie per fornire un'esperienza migliorata su questo sito web. Puoi saperne di più sui nostri cookie e su come li utilizziamo nella nostra Politica sui cookie.

Consenti tutti i cookie
Consenti solo i cookie essenziali