Zum Inhalt springen
  • +49 40 3680 74990
Igloo
  • 0
  • Anmelden
  • AR CS NL EN FI FR DE HI IT PL PT ES SV UK
  • Kontaktieren Sie uns
  • Startseite
  • Shop
  • Tutorials

    Für Benutzer


    KundenserviceKundenumfrageTestanleitungen Qualitätskontrolle (QC)Bewertung von Ergebnissen

    Für Testhersteller


    TestanpassungSchritt 1 | Holen Sie sich Ihr Igloo Schritt 2 | Testkalibrierung Schritt 3 | Barcode auf die Patrone legen

    Für Apotheker


    Zur Igloo-Gesundheitskarte hinzufügen Angepasste Berichtsanfrage
  • Downloads
  • Dokumente
  • Unternehmenslösungen


     For Businesses


    Point-of-Care-Unternehmen Apotheken Zahnarztpraxen

    Demnächst*


    Fitnessstudios und Fitnesszentren Telemedizin Kosmetologie und Schönheitssalons Hebammenbetreuung
  • Biomarker


    Biomarker


    Ferritin Vitamin D TSHHbA1cLipoprotein AApolipoprotein B

    Technologie


    Igloo Reader Pro

    Company


    About Dx365
  • Nachrichten
  • Kontaktieren Sie uns
Igloo
  • 0
    • Startseite
    • Shop
    • Tutorials
    • Downloads
    • Dokumente
    • Unternehmenslösungen
    • Biomarker
    • Nachrichten
    • Kontaktieren Sie uns
  • +49 40 3680 74990
  • AR CS NL EN FI FR DE HI IT PL PT ES SV UK
  • Anmelden
  • Kontaktieren Sie uns
  1. Kurse
  2. Making a measurement with Igloo Reader Pro
  3. Introduction
Nav
Home └Making a measurement with Igloo Reader Pro └Introduction

Making a measurement with Igloo Reader Pro

0 %

Abgeschlossen

Kursinhalt
  • Nicht kategorisiert
    • Introduction

Introduction

Zurück Weiter
Vollbild Teilen

Introduction 

Step 1 : Prepare Your Workspace and Turn On the Device

What You Need:

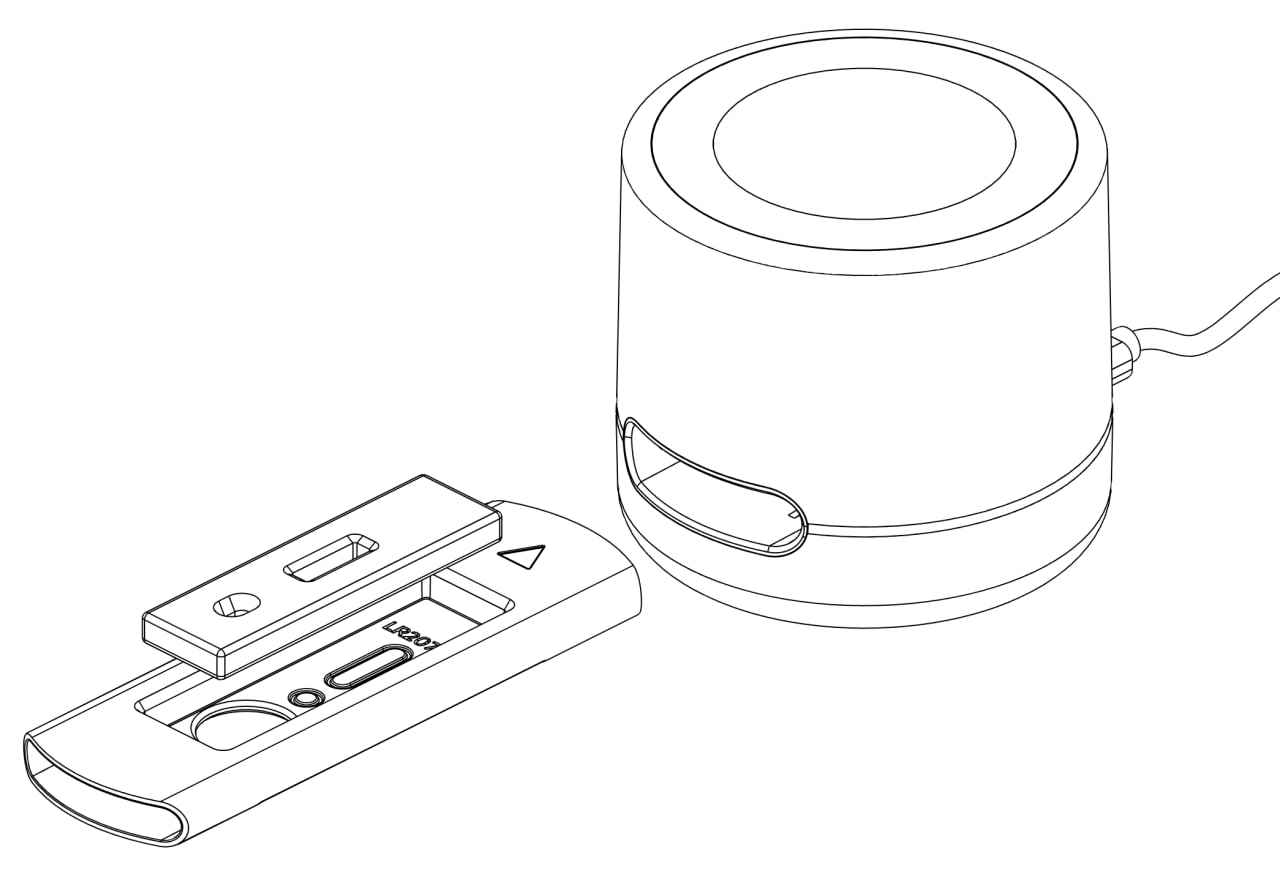
  • Dx365 Igloo Reader Pro 
  • Cassette adapter, specific to the test type
  • Lateral flow test kit with included test cassette, instruction and sample collection tools
  • Clean, flat surface away from liquids
Turn on the device by pressing the button on the bottom side of the reader. The screen will light up, and the main menu will appear after loading.
On/Off button located below


Step 2 : Set Up the Device and Enter Measurement Data

Steps:

💡

Connect WI-FI for the first measurement. This is necessary to perform a specific calibration update.

Connect the device to Wi-Fi:

  1. Go to the settings menu and ensure the Wi-Fi module
  2. From the main menu, select "New Measurement" on the touch display
  3. Fill in the required parameters:
    • Patient ID (optional)
    • Age and sex (optional)

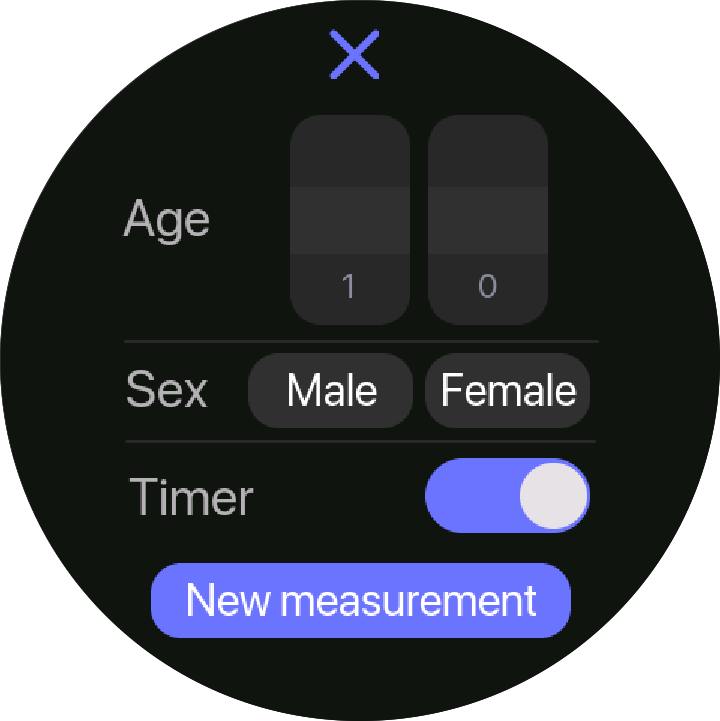
  4. Press the "Ok" button and prepare the test cassette

Step 3 : Prepare and Insert the Test Cassette

Steps:

  1. Please review the test manufacturers instructions before the collecting blood
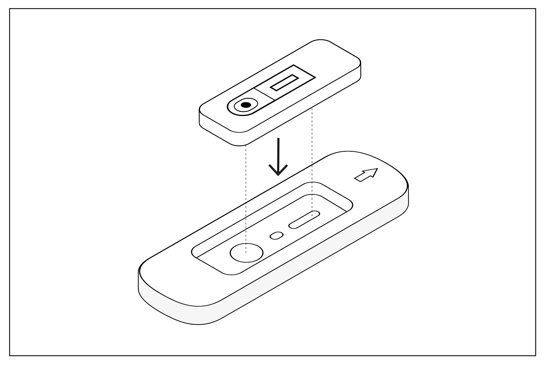
  2. Place the test cassette into the cassette adapter:
    • Ensure the test strip faces up
    • The sample well must face outward (toward the outside of the device)
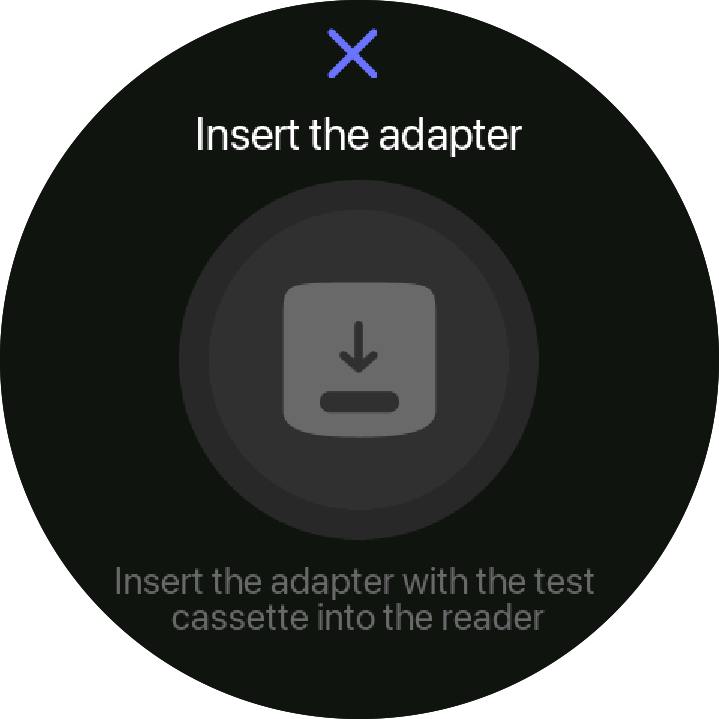
  3. Insert the adapter with the test cassette into the device slot, following the adapter’s direction
  4. ​The measurement will start automatically after you insert the adapter with the test
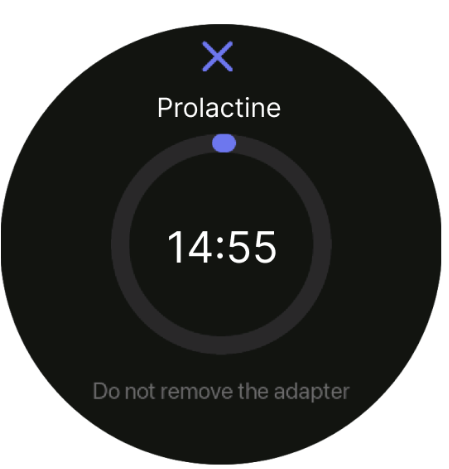
  5. Wait for the measurement to complete. Do not move or eject the adapter during this process, as it may lead to incorrect results


Step 4 : View and Share Results

Steps:

  1. When the measurement is complete, the device indicator will stop rotating                
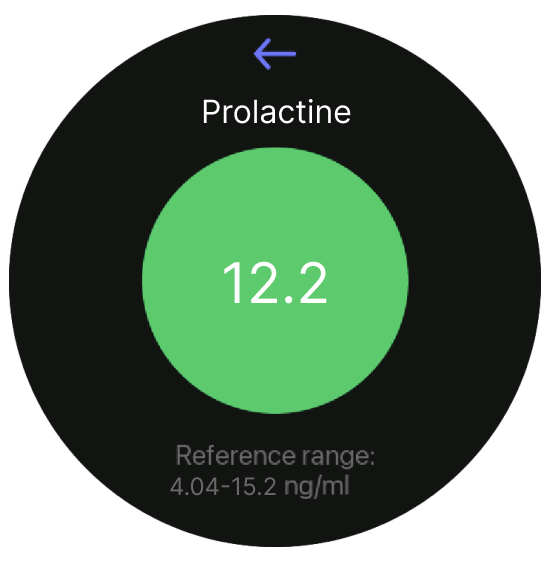
  2. The results will display on the screen (qualitative, semi-quantitative, or quantitative, depending on the test type)
  3. To share or save the results:
    • Use the application menu to export the result to a connected printer (if available)
  4. Eject the cassette adapter, remove the used test cassette


  • Infos
  • Kommentare (0)


Bewertung
0 0

Momentan sind keine Kommentare vorhanden.

Diesem Kurs beitreten
, um als erster einen Kommentar zu hinterlassen.

Rechtliches

  • Impressum
  • Legal info
  • Datenschutzrichtlinie
  • Cookie-Richtlinie
  • Verkaufsbedingungen


Kundenbetreuung

  • Kundenservice
  • Kontaktieren Sie uns
  • Downloads
  • Documents
  • Testanweisungen
  • Anweisungen des Testherstellers
Phone support

  • +49 40 3680 74990
Soziale Netzwerke

Social Media

© Dx365 GmbH - Allgemeine Geschäftsbedingungen - Datenschutzrichtlinie
الْعَرَبيّة | Čeština | Nederlands | English (US) | Suomi | Français | Deutsch | हिंदी | Italiano | Język polski | Português | Español | Svenska | українська
Unterstützt durch Odoo - Die #1 Open-Source-E-Commerce

Die Achtung Ihrer Privatsphäre hat für uns oberste Priorität.

Erlauben Sie die Verwendung von Cookies von dieser Website in diesem Browser?

Wir verwenden Cookies, um Ihnen ein verbessertes Erlebnis auf dieser Website zu bieten. Sie können mehr über unsere Cookies und deren Verwendung in unserer  Cookie-Richtlinien.

Alle Cookies erlauben
Nur essentielle Cookies erlauben